Wednesday, April 25, 2012

ARCGIS JavaScript API – USING BASIC GIS TOOLS AND COMMANDS – PART IV


1.     Introduction

 In previous articles I showed you how we can setup a map  infrastructure for consuming different dynamic layers and feature layers. I showed you how we can build  different tables with information coming from these layers. In this article I will introduce you in the creation of some basic command and tools that will interfere with the layers in the map. In the implementation of these actions I will use more actively the ViewModel  pattern found in the knockoutJS  javascript  library.

2.     Toolbar

The toolbar that will be discussed in this article consist of the following toolbar items :

·         Zoom In tool
·         Zoom out tool
·         Pan command
·         Inspect tool
·         Measure tools
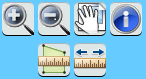


All these tools and commands have their main implementation in the common ViewModel but have a more detailed implementation in a ‘common toolbar’ ViewModel. Doing so, the main ViewModel is a light weight class with little or no logic behind, and it sole purpose is to interact  with the view (the html page). New here is also the use of templates from the knockoutJS  javascript  library.
3.     Logging

To make debugging easier, I introduced a logging component. The logging happens through a rest service and is stored in a log file at the server. This approach can be useful to  trace all errors that occurs in the application. However for debugging purpose this can also be very useful. Because a lot of methods works asynchronous, having an extended log file can help you debug errors due to inconsistent sequence of operations. Below you can see an example of a log file. I use a debug variable to enable or disable extended logging. Important is adding logging when asynchronous actions occurs. As you can see in de log file example, initialization does not always happens in the sequence of the call to the rest services.

24/04/2012 - 18:05:30 - I - startup - getconfiguration start
24/04/2012 - 18:05:30 - I - startup - getconfiguration finished
24/04/2012 - 18:05:30 - I - eventAggregator-subscribe - mapLoaded
24/04/2012 - 18:05:30 - I - eventAggregator-subscribe - legendBuild
24/04/2012 - 18:05:30 - I - addNewDynamicLayer - http://services.arcgisonline.com/ArcGIS/rest/services/World_Topo_Map/MapServer
24/04/2012 - 18:05:30 - I - addNewDynamicLayer - http://services.arcgisonline.com/ArcGIS/rest/services/World_Street_Map/MapServer
24/04/2012 - 18:05:30 - I - mapModule - init finished
24/04/2012 - 18:05:30 - I - startup - startup finished
24/04/2012 - 18:05:30 - I - layer_Initialized - http://services.arcgisonline.com/ArcGIS/rest/services/World_Topo_Map/MapServer
24/04/2012 - 18:05:30 - I - addNewFeatureLayer - http://sampleserver3.arcgisonline.com/ArcGIS/rest/services/Fire/Sheep/FeatureServer/0
24/04/2012 - 18:05:30 - I - addNewFeatureLayer - http://sampleserver3.arcgisonline.com/ArcGIS/rest/services/Fire/Sheep/FeatureServer/1
24/04/2012 - 18:05:30 - I - layer_Initialized - http://services.arcgisonline.com/ArcGIS/rest/services/World_Street_Map/MapServer
24/04/2012 - 18:05:31 - I - featureLayer_Initialized - http://sampleserver3.arcgisonline.com/ArcGIS/rest/services/Fire/Sheep/FeatureServer/1
24/04/2012 - 18:05:31 - I - featureLayer_Initialized - http://sampleserver3.arcgisonline.com/ArcGIS/rest/services/Fire/Sheep/FeatureServer/0
24/04/2012 - 18:05:31 - I - eventAggregator-publish - mapLoaded - initializeVM
24/04/2012 - 18:05:31 - I - eventAggregator-publish - mapLoaded - legendBuild
24/04/2012 - 18:05:31 - I - legendModule - start legend build
24/04/2012 - 18:05:33 - I - legendModule - build legend done
24/04/2012 - 18:05:33 - I - eventAggregator-publish - legendBuild - selectBuild


4.     Navigation tools

The migration of the Silverlight C# implementation of Zoom in and Zoom out is very easy. As you can see by comparing the two implementations, a lot of coding is similar between C# and JavaScript.

Button commands

JavaScript Code
/// <summary>
/// Zoom In task
/// </summary>
   zoomInTask: function () {
      currentCommand = "ZoomIn";
      iGisOperation.setCompleteDrawEvent(drawComplete);
      iGisOperation.setDrawMode(esri.toolbars.Draw.EXTENT); // Start draw tool with a rectangle
   },
/// <summary>
/// Zoom Out task
/// </summary>
   zoomOutTask: function () {
      currentCommand = "ZoomOut";
      iGisOperation.setCompleteDrawEvent(drawComplete);
      iGisOperation.setDrawMode(esri.toolbars.Draw.EXTENT); // Start draw tool with a rectangle
   }

C# Code

/// <summary>
/// Zoom In task
/// </summary>
  public void ZoomInTask()
  {
       currentCommand = "ZoomIn";
       gisOperations.SetCompleteDrawEvent(DrawComplete);
       gisOperations.SetDrawMode(DrawMode.Rectangle); // Start draw tool with a rectangle
  }
/// <summary>
/// Zoom out task
/// </summary>
  public void ZoomOutTask()
  {
       currentCommand = "ZoomOut";
       gisOperations.SetCompleteDrawEvent(DrawComplete);
       gisOperations.SetDrawMode(DrawMode.Rectangle); // Start draw tool with a rectangle
  }

Activation of the zoom action

JavaScript code
iGisOperation.mapZoom(currentCommand, args.getExtent());
iGisOperations.setDrawMode(esri.toolbars.Draw.EXTENT);


C# code

gisOperations.MapZoom(currentCommand, args.Geometry);
gisOperations.SetDrawMode(DrawMode.Rectangle);

Next I use the zoom in the map method, this is the  main method used for  the zoom in and  the zoom out actions. Below is the comparison between the JavaScript and C# code.

Zoom action

JavaScript Code
mapZoom: function (action, geometry) {
  try {
        var multiplier;
        if (action == "ZoomIn") {
            map.setExtent(geometry.getExtent());
        }
        Else if (action == "ZoomOut") {
            var currentExtent = map.extent;
            var zoomBoxExtent = geometry.getExtent();
            var zoomBoxCenter = zoomBoxExtent.getCenter();
            var whRatioCurrent = currentExtent.getWidth() / currentExtent.getHeight();
            var whRatioZoomBox = zoomBoxExtent.getWidth() / zoomBoxExtent.getHeight();
            var newEnv = null;
            if (whRatioZoomBox > whRatioCurrent) {
            // use width
                multiplier = currentExtent.getWidth() / zoomBoxExtent.getWidth();
               var newWidthMapUnits = currentExtent.getWidth() * multiplier;
               newEnv = new esri.geometry.Extent(zoomBoxCenter.x - (newWidthMapUnits / 2), zoomBoxCenter.y,
                zoomBoxCenter.x + (newWidthMapUnits / 2), zoomBoxCenter.y, map.spatialReference);
            }
            else {
            // use height
                multiplier = currentExtent.getHeight() / zoomBoxExtent.getHeight();
                var newHeightMapUnits = currentExtent.getHeight() * multiplier;
                newEnv = new esri.geometry.Extent(zoomBoxCenter.x, zoomBoxCenter.y - (newHeightMapUnits / 2),
               zoomBoxCenter.x, zoomBoxCenter.y + (newHeightMapUnits / 2), map.spatialReference);
            }
            if (newEnv != null)
                            map.setExtent(newEnv.getExtent());
                    }
     } catch (e) {
           throw new Error("zoom action failed. " + e.name + "\n" + e.message);
     }
}

C# code

/// <summary>
/// Zoom in and out task
/// </summary>
/// <param name="action">ZoomIn or ZoomOut</param>
/// <param name="geometry">Rectangle to be zoomed</param>
public void MapZoom(string action, ESRI.ArcGIS.Client.Geometry.Geometry geometry)
{
  try
    {
       if (action.Equals("ZoomIn"))
       {
         mapControl.ZoomTo(geometry as Envelope);
       }
       Else if (action.Equals("ZoomOut"))
       {
         Envelope currentExtent = mapControl.Extent;
         Envelope zoomBoxExtent = geometry as Envelope;
         MapPoint zoomBoxCenter = zoomBoxExtent.GetCenter();
         double whRatioCurrent = currentExtent.Width / currentExtent.Height;
         double whRatioZoomBox = zoomBoxExtent.Width / zoomBoxExtent.Height;
         Envelope newEnv = null;
         if (whRatioZoomBox > whRatioCurrent)
         // use width
         {
           double multiplier = currentExtent.Width / zoomBoxExtent.Width;
           double newWidthMapUnits = currentExtent.Width * multiplier;
           newEnv = new Envelope(new MapPoint(zoomBoxCenter.X - (newWidthMapUnits / 2), zoomBoxCenter.Y),
          new MapPoint(zoomBoxCenter.X + (newWidthMapUnits / 2), zoomBoxCenter.Y));
         }
         else
         // use height
         {
           double multiplier = currentExtent.Height / zoomBoxExtent.Height;
           double newHeightMapUnits = currentExtent.Height * multiplier;
           newEnv = new Envelope(new MapPoint(zoomBoxCenter.X, zoomBoxCenter.Y - (newHeightMapUnits / 2)),
           new MapPoint(zoomBoxCenter.X, zoomBoxCenter.Y + (newHeightMapUnits / 2)));
         }
         if (newEnv != null)
           mapControl.ZoomTo(newEnv);
     }
  }
  catch (Exception ex)
  {
       messageBoxCustom.Show(String.Format("MapZoom-{0}", ex.Message),
       GisTexts.SevereError,MessageBoxCustomEnum.MessageBoxButtonCustom.Ok);
  }
}

As you can see for the two different language environment,  the same logic can be used for the two  projects.  The fact that the same code can be used is mainly due that both environments are based on the ArcGis Api’s that on its turn is based on the rest services from the ArcGis server. 

5.     Inspect tool

With the inspect tool we come to a more sophisticated tool. The inspect tool will retrieve all features that intersects with the point  indicated on the map using a predefined buffer.  The layers used on the map for the query must be checked on the selection tab of the tab control.  The results containing the attributes will be displayed on the query tab. To simplify the display, I used a html embedded template of knockoutJS that make use of dependency properties of the ViewModel easy to show.

Step 1 : Start a draw action of a point selection.

infoCommand: function () {
  try {
    iGisOperation.getMeasurement().clearResult();
    iGisCommonTasks.setFinishedInfoEvent(handleInfoResults);
    iGisCommonTasks.infoQuery(true);
  } catch (e) {
    logMessage("E", "IQ-01", e.Message);
  }
 }

Step 2: Start the draw action in the infoQuery method. When the tool is finished, the result will be returned in the callback function  ‘handleInfoResults’

        infoQuery: function (isSpatialQuery) {
            // Info implementation , using ESRI API
            iGisOperation.resetCompleteDrawEvent(drawComplete);
            if (isSpatialQuery)
                currentCommand = "Info";
            else
                currentCommand = "AddressInfo";
            iGisOperation.setCompleteDrawEvent(drawComplete);
            iGisOperation.setDrawMode(esri.toolbars.Draw.POINT);
        }
Step 3: Start the spatial query for all the selected layers.

if (currentCommand == "Info" || currentCommand == "AddressInfo") {
  // Use ESRI API for Info
  var layer = null;
  var i;
  var query, queryTask;
  iGisOperation.setDrawMode(null);
  iGisOperation.resetCompleteDrawEvent();
  result = new Array();
  errorCount = 0;
  errorMessages = '';
  totalCountLayers = 0;
  currentCountLayers = 0;
  if (currentCommand == "Info") {
    totalCountLayers = iGisOperation.getLayersSelectionInfos().length;
    for (i = 0; i < iGisOperation.getLayersSelectionInfos().length; i++) {
      if (iGisOperation.getLayersSelectionInfos()[i].selected && iGisOperation.getLayersSelectionInfos()[i].layer.type == 'Feature Layer') {
        queryTask = new esri.tasks.QueryTask(iGisOperation.getLayersSelectionInfos()[i].url);
        query = new esri.tasks.Query();
        query.geometry = args;
        query.outFields = ["*"];
        query.spatialRelationship = esri.tasks.SPATIAL_REL_INTERSECTS;
        queryTask.execute(query, function (features) {
           currentCountLayers += 1;
           if (!features.name) {
              if (features.features.length > 0)
                 result.push(features);
           }
           queryInfosComplete();
        }, function (e) {
           currentCountLayers += 1;
           errorCount += 1;
           errorMessages += ">";
           errorMessages += e.message;
           errorMessages += "\n";
           queryInfosComplete();
         });
       }
       else
         currentCountLayers += 1;
    }
  }

The function ‘queryInfosComplete’ is used to verify if all layers has been handled, if this is the case, the callback function is called to handle over the results to the view model.
    function queryInfosComplete() {
        if (currentCountLayers >= totalCountLayers) {
            if (finishedInfoOperation != null)
                finishedInfoOperation(result);
        }
    }

Step 4: Handle the results to the calling view model. We build here a list of all attributes found and that is used to scroll through.

    var attributesResults;
    var currentItem;
    function handleInfoResults(results) {
        try {
            iGisCommonTasks.setFinishedInfoEvent(null);
            attributesResults = new Array();
            var attributeItem;
            for (var i = 0; i < results.length; i++) {
                var resultFeatures = results[i].features;
                for (var j = 0; j < resultFeatures.length; j++) {
                    var attributes = new Array();
                    for (var item in resultFeatures[j].attributes) {
                        attributeItem =
                            new attribute(ko.observable(item), ko.observable(resultFeatures[j].attributes[item]));
                        attributes.push(attributeItem);
                    }
                    attributesResults.push(attributes);
                }
            }
            if (attributesResults.length > 0) {
                viewModel.resultAttributes(attributesResults[0]);
                viewModel.resultCount((attributesResults.length));
                currentItem = 1;
                viewModel.resultIndex(currentItem);
                viewModel.resultVisible(true);
            }
            else {
                alert("No results found");
            }
        } catch (e) {
            logMessage("E", "error in handleInfoResults->" + e.name + "\n" + e.message, "commonToolbarVM");
        }
    }
An array of attributes is extracted from the results is used to display attributes of one feature at a time.
Two buttons are used  to scroll through the results. The query tab looks like the example below.


The html code that is used for displaying the result above with the knockoutJS data binding is :
<div id="queryResults" data-bind="visible: resultVisible">
   <table class="tableResult">
       <thead ><span data-bind="text: resultHeader" style="font-size:medium"/>
            <th scope="col">Field</th>
            <th scope="col">Value</th>
       </thead>
       <tbody data-bind="foreach: resultAttributes">
            <tr>
                <td data-bind="text: field">
                </td>
                <td data-bind="text: value">
                </td>
            </tr>   
        </tbody>
   </table>
   <input id="nextResult" type="button" value="Next"  data-bind="click: nextResultExecute, enable: nextResultCanExecute" />
   <input id="prevResult" type="button" value="Previous" data-bind="click: prevResultExecute, enable: prevResultCanExecute" />
   <input id="closeResult" type="button" value="Close" data-bind="click: closeResultExecute, enable: closeResultCanExecute"  />
</div>

6.     Measure tools

In the Silverlight ArcGis API, this is a simple tool that can be implemented without writing custom code. The implementation happens through the interaction library from blend.
In JavaScript the job is much harder if you don’t want to use the ESRI widget and create your own button implementation. Creation of a custom measurement consist of the following steps:
·         Add the measurement widget to the html page during the onload event of the map.
·         Activate the measure tools through button commands.
·         In the callback method the geometry drawn is returned.
·         Call the geometry service for calculating area and length of the drawn geometry.
·         Return the values to the ViewModel for displaying .

Step : Add measurement widget in the init method of the map module

            dojo.connect(mapControl, 'onLoad', function (map) {
                //resize the map when the browser resizes
                dojo.connect(dijit.byId('map'), 'resize', map, map.resize);
                initToolbar(map);
            });
Step: Activate the measure tool in the widget.

measureCommand: function (tool) {
   iGisOperation.getMeasurement().clearResult();
   iGisOperation.getMeasurement().setTool(tool, true);
   dojo.connect(iGisOperation.getMeasurement(), "onMeasureEnd", function
      (activeTool, geometry) {
      this.setTool(activeTool, false);
      // calcuate the area or length of the geometry 
      if (activeTool == "area") {
        iGisGeoProcessing.calculateAreaLength(geometry, function
          calcResults(areaPolygon, lenPolygon) {
          if (areaPolygon != null)
           viewModel.message1("Area is " + areaPolygon.toFixed(0) + " m2 and the length is " + lenPolygon.toFixed(0) + " m");
          else
            viewModel.message1("Error occured during the calculation, see log file");
         });
       }
       else if (activeTool == "distance") {
         iGisGeoProcessing.calculateLength(geometry, function calcResults(lenPolyline) {
           if (lenPolyline != null)
             viewModel.message1("Length is " + lenPolyline.toFixed(0) + " m");
           else
             viewModel.message1("Error occured during the calculation, see log file");
          });
        }
      });
 }

Step  Calculate the area or length.

Two methods are added to the geo processing class to calculate the area and / or length of geometries. Later I will add more methods to this class for supporting the feature editing to
calculateAreaLength: function (geometry, callBack) {
   var areasAndLengthParams = new esri.tasks.AreasAndLengthsParameters();
   areasAndLengthParams.lengthUnit = esri.tasks.GeometryService.UNIT_METER;
   areasAndLengthParams.areaUnit = esri.tasks.GeometryService.UNIT_METERS;
   iGisOperation.getGeometryService().simplify([geometry],
      function (simplifiedGeometries) {
         areasAndLengthParams.polygons = simplifiedGeometries;
         iGisOperation.getGeometryService().areasAndLengths(areasAndLengthParams,
            function outputAreaAndLength(result) {
               var areaPolygon = result.areas[0];
               callBack(result.areas[0], result.lengths[0]);
            }, function errorAreaLength(err) {
            logMessage("E", "calculate area failed -->" + err.message, "commonToolbarVM");
                 callBack(null,null);
         });
   });
}

7.     Conclusion

By implementing these tools we already touched a lot of geometry processing. In the case of the inspect tool, I discover one important difference when executing spatial queries. In the Silverlight API you can add a tag to the query, so when the results are returned from the query, the tag can be used to identify the result set.  In the JavaScript API, no tag can be added to the query. The result of this is that I could not identify the origin (layer) from the features. I will later see if there is a way to work around this lack of information in the JavaScript API.

The use of geometry services will play an important role when we start to do feature editing. In the next document I will introduce some basic editing functionality.

Monday, March 26, 2012

ARCGIS JavaScript API – ADDING A LAYER SELECTION – PART III


1.     Introduction


Before going to implementing different tools and commands from the toolbars for doing different GIS functions I add a list that contains all the layers that  can be used for doing spatial and attribute queries.  This list is similar to what can be found in the ArcGis desktop application AcMap on the second tab.  As is the case of the legend module I used a jQuery extension in combination with a template to create a layer selection list. The actions needed for creation the layer selection list consists of the following steps

·         Create a jQuery HTML template that is hosted on the web server and will serve as the blueprint for a list item. The template is retrieved through an AJAX request.

·         Create a simple jQuery extension that will call the jQuery template plug-in.

·         Build an array of layers with for each layer a number of useful attribute information. The creation of the array will consists of a call of a rest service for each layer. In the example outlined here, I will limit the array of layers to feature layers. This could easy be extended to all layers having a query capability and not necessary having attributes exposed.

To make the layer selection list available to all components, the list will be maintained in the gisOperation class.

2.     Layer selection template


The template I use is much simpler than the one used in the legend. It can easy be customized by CSS to enhance the presentation of the list. In my example, the template looks like this:

<li>

  <input type="checkbox" style="float:left" id="${$item.getCheckboxID()}" checked="${$item.getChecked()}" />

  <h3 class="agsSelect" style="margin:0 0 0 25px;padding:0;" >${title}</h3>

</li>

<div style="clear:both"/>

In this template I use two functions  to calculate an unique ID and event handling of the checkbox checked.

3.     Layer selection jQuery extension


The most important is the update of the array list with the selection set or reset. This is done by the code below that is linked to the click event of the checkbox.

// Handle the select toggle click event
function checkSelectLayer(ev) {
// We'll find the layer based on the select id, so capture it
  var selectId = this.id,select =this.checked;
  $.each(iGisOperation.getLayersSelectionInfos(), function (index, selectLayer) {
     if (selectLayer.selectId === selectId){
        iGisOperation.getLayersSelectionInfos()[index].selected = select; 
     }
     return;
  });                                       
}

4.     Layer selection list creation


The creation of the layer selection list is largely done in a the layer selection module. In this module I put some initialization into it that will be responsible for the maintenance of the list. For its creation the layer selection list depends on the output of the legend module. To synchronize the maintenance of the layer selection list with the legend module, I used the event aggregator  class to subscribe to the end of the legend build. After the legend is build, all extra information needed will be available.
The init of the layer selection module is responsible for the subscription process.

var layerSelectionModule = (function () {
    var i, j, k, l, index;
    var totalLayers2Check = 0;
    var totalLayersChecked = 0;
    var urlGet;
    var divLegend;
    var selectionInfo;

….

    return {
        init: function (divElement) {
            this.divLegend = divElement;
            iEventAggregator.subscribe("legendBuild", selectBuild, divElement);
        }
    }
});

The selectBuild function will actual create the layer selection list upon the end of the build of the legend.

function selectBuild() {
// Calculate number or layers
  for (i = 0; i < iGisOperation.getLayersLegendInfos().length; i++) {
    if (iGisOperation.getLayersLegendInfos()[i].layers != null)
      totalLayers2Check += iGisOperation.getLayersLegendInfos()[i].layers.length;
  }
  // Start building the selection layer list
  for (i = 0; i < iGisOperation.getLayersLegendInfos().length; i++) {
    if (iGisOperation.getLayersLegendInfos()[i].layers != null) {
     for (j = 0; j < iGisOperation.getLayersLegendInfos()[i].layers.length; j++) {
     // Skip group layer
       if (iGisOperation.getLayersLegendInfos()[i].layers[j].parentLayerId > -1) {
         urlGet = iGisOperation.getLayersLegendInfos()[i].url + "/" + iGisOperation.getLayersLegendInfos()[i].layers[j].id + "?f=json&callback=?";
         $.getJSON(urlGet, function (data) {
            if (data.type == 'Feature Layer') {
              index = -1;
              for (k = 0; k < iGisOperation.getLayersLegendInfos().length; k++) {
                if (iGisOperation.getLayersLegendInfos()[k].layers != null) {
                  for (l = 0; l < iGisOperation.getLayersLegendInfos()[k].layers.length; l++) {
                    if (iGisOperation.getLayersLegendInfos()[k].layers[l].name == data.name) {
                       index = k;
                       break;
                     }
                   }
                   if (index > -1)
                     break;
                 }
               }
               if (index > -1) {
                 selectionInfo = 
                   new layerSelectionInfo(iGisOperation.getLayersLegendInfos()[index].url, data.id, data.name, data.fields, data.displayField, iGisOperation.getLayersSelectionInfos().length);
                   iGisOperation.getLayersSelectionInfos().push(selectionInfo);
               }
             }
             terminateLayerInitialize();
           });
         }
         else
           terminateLayerInitialize();
       }
     }
   }
 }
 function terminateLayerInitialize() {
   totalLayersChecked += 1;
   if (totalLayersChecked == totalLayers2Check) {
   // All layers has been retrieved, ready to move the contents to the list
     var selectLayers = $("#selectRegion").agsSelect({ autoLoadTemplates: true });
   }
 }

I use a simple counter system to know when all rest services has been processed. When this is done, the jQuery extension is called with the template plugin. During the processing of the rest services important information as fields are included into the layer selection list. This will be useful during the query command and tools. I also maintain the layer selection array into the gisOperation class for common use.

The final result looks like this:

Tuesday, March 13, 2012

ARCGIS JavaScript API – BUILDING A LEGEND COMPONENT – PART II


1.     Introduction


As we see in the ArcGis Desktop application (ArcMap), the use of the legend consists of more than just displaying the rendering information. Behind the legend extra functionality is exposed through context menus. In the Silverlight desktop application I wrote some of this functionality was added to the Silverlight API Legend. This extra functionality was done through extending the Silverlight API legend control with extra methods and attached in the XAML through commands. The Microsoft Silverlight framework and MVVM makes this possible.

In the JavaScript API however, the legend control has only limited functionality making it very difficult to create extended functionality. To solve this issue, a custom legend control must be created. A solution could be creating the legend with the help of the Dojo library, but for a generic solution this is not a simple job. Another solution is using jQuery templates. The jQuery templates is an extension created by Microsoft  and added to the community. The interesting aspect is the use of html templates to define how a control is shown using all the power of CSS and a build-in processing syntax. There was an interesting session  at ESRI in 2011 explaining this technique of building a custom legend control.  To have a flexible solution, the template is saved on the server in a file that is downloaded and added to the legend region. The initial template I used has the following contents.

<li>
  <input type="checkbox" style="float:left" id="${$item.getCheckboxID()}" checked="${$item.getChecked()}" />
      <h3 class="agsLegendOpen" style="margin:0 0 0 25px;padding:0;" >${title}</h3>
     {{if serviceType == 4}}
       {{if renderer.type=="simple"}}
          {{if renderer.symbol.type=='esriPMS'}}
            <div style="display:table; margin:10px 5px;" >
              <img  style="padding-right:10px;
              float:left;
              display:inline-block;
              vertical-align:middle;"
              src="data:${renderer.symbol.contentType};base64,${renderer.symbol.imageData}"/>
            </div>
          {{else renderer.symbol.type=='esriSFS'}} 
             {{if renderer.symbol.color == null}}
                  <div style="display:table-cell;
                    vertical-align:middle;
                    width:20px;
                    height:20px;
                    background-color:rgba(151,219,242,255);
                    border:${$item.getBorder(renderer.symbol.outline)};">
                  </div>
                {{else}}
                  <div style="display:table-cell;
                    vertical-align:middle;
                    width:20px;
                    height:20px;
                    background-color:${$item.getColor(renderer.symbol.color)};
                    border:${$item.getBorder(renderer.symbol.outline)};">
                  </div>
             {{/if}}
          {{else renderer.symbol.type=='esriSMS'}}
            {{if renderer.symbol.style=="esriSMSCircle"}}
            {{/if}}
          {{/if}}
        {{else renderer.type=='uniqueValue'}}
          <ul>
          {{each renderer.uniqueValueInfos}}                
                  {{if $value.symbol.type=='esriPMS'}}
                          <div style="display:table;margin:5px 5px;">                        
                          <img src="data:${$value.symbol.contentType};base64,${$value.symbol.imageData}" style="vertical-align:middle;"/>
                          <span style="padding:0px 5px 0px 0px;display:table-cell;vertical-align:middle;">${$value.label}</span>
                          </div>
                  {{else $value.symbol.type=='esriSFS'}}
                          <li style="display:table; margin:5px 5px;" >                               
                                  <div style="display:table-cell;vertical-align:middle;width:20px;height:20px;background:${$item.getColor($value.symbol.color)};border:${$item.getBorder($value.symbol.outline)};" ></div>
                                  <span style="padding:0px 5px 0px 5px;display:table-cell;vertical-align:middle;">${$value.label}</span>
                          </li>
                  {{else $value.symbol.type=='esriSLS'}}
                    <li style="display:table;" >
                      <div style="margin:8px 5px -15px 5px;
                        width:20px;
                        height:${$value.symbol.width}px;
                        background:${$item.getColor($value.symbol.color)};">
                      </div>
                      <span style="padding:0px 5px 0px 5px;
                        display:table-cell;
                        vertical-align:middle;">
                        ${$value.label}
                      </span>
                    </li>
                  {{/if}}
          {{/each}}
        </ul>
       {{/if}}
     {{/if}}
</li>
<div style="clear:both"/>

As you can see, there are conditional statements and loop statements. To finalize this approach I encapsulate the template class into a custom jQuery plugin. All these classes makes part of the legend module.

2.     Legend in action

To handle this approach of program logic, I have to retrieve extra information of the ArcGis server using the REST API. This extra information is retrieved through the legend module and not during the map initialization process. Doing so we can loosely couple the map module from the legend module,  allowing this module to handle all data needed for the legend. The communication between the map module and the legend module is done through our class eventAggregator that will inform the legend module when the map is initialized (loaded). During the initialization method of the legend module a callback functions is hooked to the map loaded event  as you can see in the code below.
var legendModule = (function () {
    var divLegend;
    var layersCount;
    var layersTotal
    function legendBuild(eventName, eventData, tagData) {
…
       }
    return {
        initLegend: function (divElement) {
            this.divLegend = divElement;
            iEventAggregator.subscribe("mapLoaded", legendBuild, divElement);
        }
    }

Because the retrieving of all the legend information coming from the REST services is asynchronous, I use a simple counter to know when the last information is retrieved and all the legend information is available to be applied in the template. The code below shows how the build of the legend is started after the last legend has been processed. We simply called the custom legend  jQuery plug-in
    function buildLegend() {
        if (layersCount == layersTotal) {
            var legend = $("#legendRegion").agsLegend({ });
        }

To activate the templates, this can be done through this method in the jQuery plug-in.
    $.fn.agsLegend = function (options) {
        opts = $.extend({}, $.fn.agsLegend.defaults, options);     
        if (opts.autoLoadTemplates) {
            getTemplate();
        }
        return this.each(function () {
                $this = $(this);
                $this.delegate("input[type='checkbox']", "click", checkLayerVisibility);  
                $this.delegate("h3","mouseup",rightClick);
                if (opts.isCollapsible) { makeCollapsible(this); }   
        }

Upload of the template from the server is done by this code through a AJAX call.
    function getTemplate() {
        $.ajax({
            url: opts.templateFileURL,
            success: opts.onTemplateLoaded || handleTemplateResponse
        });
    }

To apply the template, you can do this by this function below. You simply insert the template into a script section of the head section. Using the tmpl method of the jquery template plug-in the data is inserted into the template.

    function handleTemplateResponse(data) {
        script = document.createElement("script");
        script.style.display = "none";
        script.type = "text/x-jquery-tmpl";
        script.id = opts.templateDOMId;
        script.text = data;
        $('head').append(script);                  
        $("#"+opts.templateDOMId).tmpl(iGisOperation.GetLayersLegendInfos(),
                {
                    getColor: getColor,
                    getBorder: getBorder,
                    getChecked: getChecked,
                    getCheckboxID: getCheckboxID
                }).appendTo($this);
    }

Some methods are needed to format the values in the template.The final result of all this, is a legend that looks like this.

The legend build here is a first simple implementation. I will show later how we can enhance the look and feel of the legend by adding concept as grouping using more advanced rendering support. All legend information will be maintained in the gisOperation class so that other modules can benefit from this data.

In the coming weeks I will add a toolbar to the application to allow different GIS operations on the map as zooming and selecting.